Table of Contents
LoRaWAN Gateways

Overview
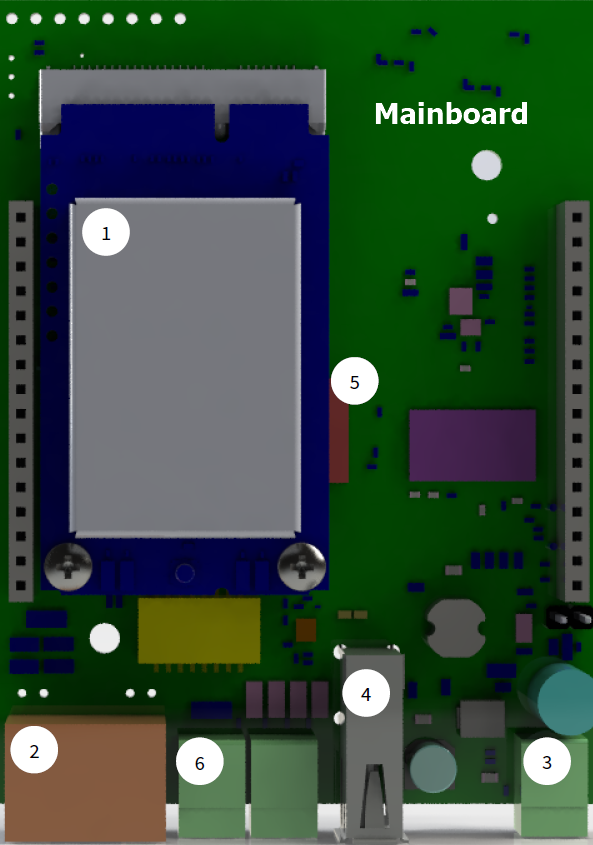
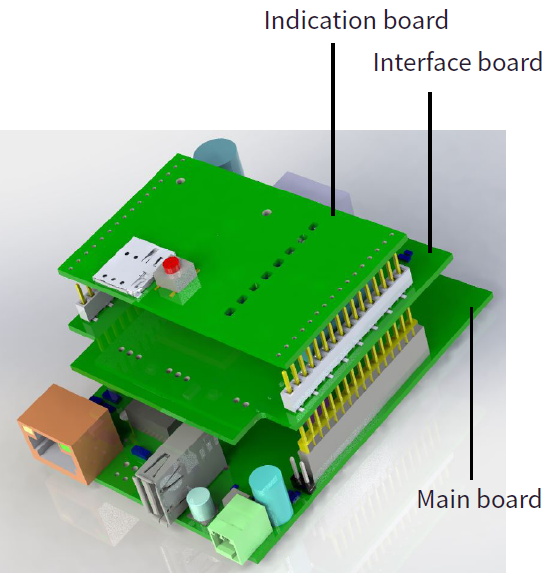
JOOBY Outdoor Gateway LoRaWAN 3хх/4хх


- Mini PCIe Card LoRaWAN Concentrator
- Ethernet/PoE. PoE - IEEE 802.3af/at, Mode B (midspan), 4/5(+),7/8(-)
- USB 2.0
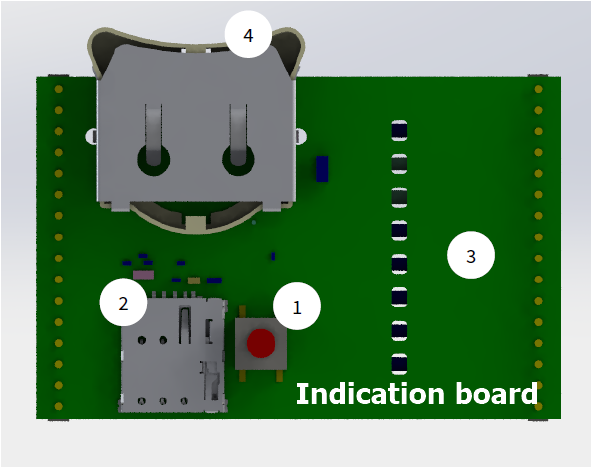
- Nano SIM-card slot
- CPU
- Backup battery connector. For 12V Li-ion/Li-Pol Battery.
- Power connector DC 12-16,5V.
- DС 12V - without using a backup battery;
- DC 15V±1,5V power supply is required to charge the Backup battery Charge Pump.
- RS485
- Tamper connectors

- Functional button (Fn). Factory reset/Switching memory bank
- Slot for RTC battery Li-ion CR/BR 2032
- LED Indicators
| LEDs name | Function | Colour |
|---|---|---|
| POWER | ||
| DC_IN | Availability of DC power supply | green |
| PoE | Availability of PoE power supply | green |
| BAT | Charging status of Backup Battery | Charging in progress – red, Fully charged - green |
| SYSTEM | ||
| STATUS | Status Indication of Gateway | Normal work mode/Successful loading – green, Error / Standby - red |
| ALARM | Disconnecting the tamper – Gateway case has been opened | red |
| LTE | ||
| STATUS | LTE is activated | green |
| NET | LTE is connected | Yellow led blinks slowly when searching network, Yellow led blinks fast when transfer is online |
| GNSS | GNSS is working | green |
| LAN | ||
| Link | Link | green |
| ACT | Activity | yellow |
| LoRaWAN | ||
| 1 | First LoRaWAN Module is available | blue |
| 2 | Second LoRaWAN Module is available | blue |
| NET | Connection to server is available | green |
| WLAN | WiFi is available | green |
| 1PPS | 1PPS signal is available | green led blinks once per second if available |
| RS485 | RS485 receive/transmit | green – receive progress, red – transmit progress, 0 – Not active |
JOOBY Indoor Gateway LoRaWAN 5хх
Factory reset
In this case, the hardware reset rule is 30-30-30.
- Long press (30 sec) - System|Status led blinks red;
- When System|Status led lights red, then release Fn - wait for 30 sec;
- System|Status starts to blink yellow – long press (30 sec);
- System|Status led and System|Alarm led light red – release Fn;
- Factory reset completed successfully. The device will be rebooted.
Switching memory bank/Alternate memory bank
- Long press (30 sec) - System|Status led blinks red;
- When System|Status led lights red, then release Fn - wait for 30 sec;
- System|Status starts to blink yellow – long press (15 sec);
- System|Status led lights red – release Fn;
- The device will be rebooted and loads from an alternate memory bank.
Access to Web GUI
By default, web-interface is available on Lan and Wi-Fi only. Wi-Fi interface is available as an option, depending on gateway model.
Web-interface settings can be changed in System ⇒ Administration ⇒ HTTP server configuration.
The LAN interface is set to static IP - 192.168.100.100/24.
- Connect the Ethernet cable to the LAN gateway port and the LAN port of your PC (port to port).
- Configure static IP address for the LAN interface of your PC. For example: 192.168.100.101/24


- In address bar of your browser (it is recommended to use Mozilla Firefox or Google Chrome), enter
http://192.168.100.100orhttp://jogl-ffffff.local.
ffffff - last three octets of the device's MAC address.
Username: admin
Password: lorawan

It is recommended to change the Administrator password when login in for the first time!
System ⇒ Administration ⇒ Gateway password

- Password ⇒ Confirmation ⇒ Save. - Can be reset to manufacturer using “Factory reset”.
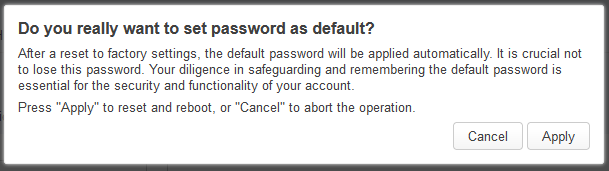
It is possible to set a user password as the “default password”:
- Password ⇒ Confirmation ⇒ toggle button - “Use as default” ⇒ Save.
Warning! “Use as default” - Sets a new “default password” and rewrite manufacturer password. Use it carefully. Pay attention on the warning in the pop-up window. Cannot be reset to manufacturer default via “Factory reset”.
SSH Access
By default:
- SSH - disabled.
- Port - 22.
- Access to password - enabled.
- User - root.
- Password - not specified.
It is neccessary to specify a password and/or keys when enabling SSH.
Network
Interface Priority
In case of using several connections (Ethernet + LTE), it is possible to select the interface through which LoRa packets will be sent. Interface number “0” (first in the list) is considered as priority. Use the UP/DOWN buttons to raise/lower priority. Use “Save” to apply the changes.
Network ⇒ Interfaces ⇒ General

Ethernet
Default IP address of the LAN gateway interface - 192.168.100.100/24.
You can change the IP address to a static one from your network or set it to automatically obtain addresses using the DHCP protocol.
Network ⇒ Interfaces ⇒ Ethernet


LoRaWAN
Settings
There are two variants of “LoRaWAN network settings” - Packet Forwarder or Basic Station.


Gateway ID - Gateway identificator.
Mode - Operating mode (Packet Forwarder or Basic Station).
Server address - NS server address (Network Server).
Region - LoRaWAN frequency plans and rules for countries/regions. Defined in the regional plans section LoRaWAN Regional Parameters.
System
Firmware

- Firmware version - Information about software version. Active memory bank.
- Bank configuration - Switching memory bank. Can be set to - A/B.
- Factory reset - Reset to default settings.
- Flash new firmware image - Software update using PC via Web interface.
Update settings
The remote/automatic software update subsystem uses a solution based on Eclipse hawkBit™.
By default, software updates are configured on the equipment manufacturer's servers - gwupdate.infomir.com. It is possible to configure and use your own update servers based on the Eclipse hawkBit™ solution.

Backup/Restore
Saving and restoring settings. It is possible to save the configuration to a file and then restore it after resetting to factory settings, or load the saved configuration on another device.

Customization
It is possible to order a software version with user settings from the manufacturer. All user settings will work as (Factory settings) in this case. This can be done by request Sales department.
It is necessary to:
- Make/apply all settings in Web interface.
- Save settings in file using Backup/Restore.
- Submit files to the manufacturer through the sales department.